If you want to blog with Obsidian, then this article will show you how.
There are two ways to start blogging with Obsidian: Using Obsidian Publish (Paid) or using the Obsidian WordPress Publish community plugin (Free)
This article will show you how to set up both methods and the one you should choose.
Let’s get started.
Benefits of Blogging with Obsidian
Obsidian is not only a note-taking tool but also a great writing app. Why would anyone consider blogging with Obsidian?
Here are the main reasons:
Plain text files
Obsidian rises above all the other note-taking tools because it stores your notes in plain text (markdown) files. This means you’ll always have a backup of your blogs on your local drive or cloud storage (depending on where you’re storing your vault.)
Works everywhere
Obsidian is a free app that works natively on every platform: Mac, iOS, Android, Windows, Linux… You name it.
This is especially helpful if you work on many different devices and across different operating systems.
This allows you to work on your blogs without any platform limitations.
Frictionless
Your blog is an excellent way to share your thoughts and expertise online.
And blogging with Obsidian makes total sense since it contains all your notes.
No more back and forth between different apps and interfaces. You can enjoy a streamlined content creation workflow within Obsidian.
This makes note-taking, thinking, linking, creating, and sharing as easy as pie.
HEY – WANT TO TURN YOUR NOTES INTO CONTENT?
If you’re tired of amassing tons of notes without ever being able to turn them into something… then feel free to check out my 7-day FREE email course by clicking here. (opens in a new window)
Obsidian Publish
The first option to start blogging with Obsidian is using Obsidian’s native service called Obsidian publish.
This feature allows you to publish your blog in an obsidian style kind of blog like so:
How to set up Obsidian Publish
Creating and logging into your Obsidian account
The first thing is to create an Obsidian account (if you don’t have one already)
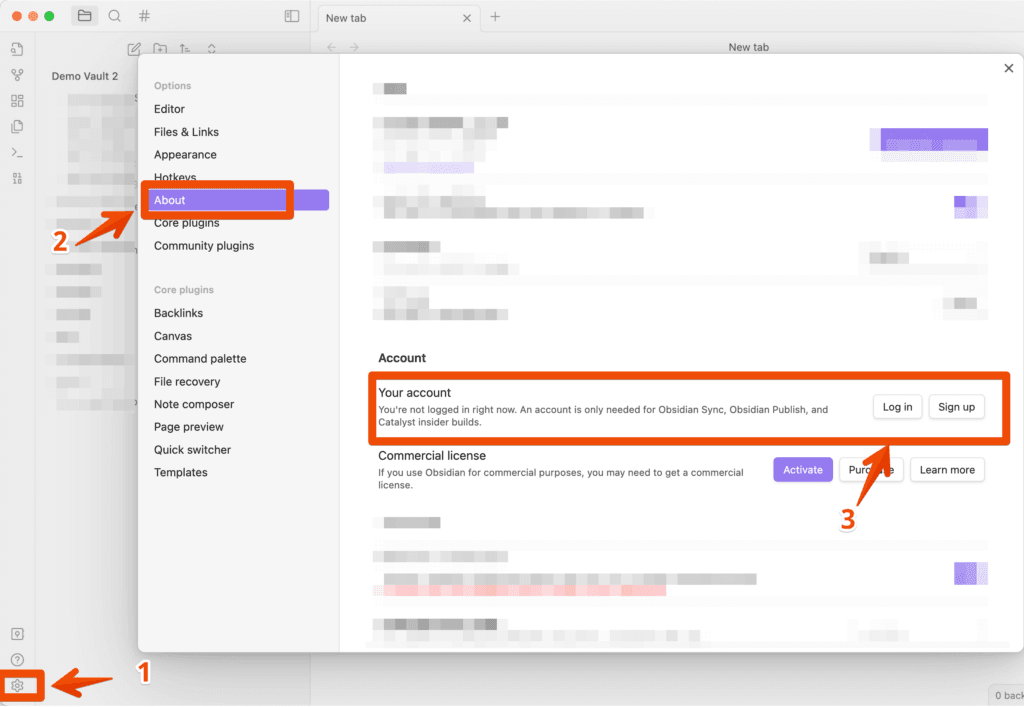
Second, you’ll need to log into your account in Obsidian.
For that, simply open Obsidian > Settings > About > Account > Log in
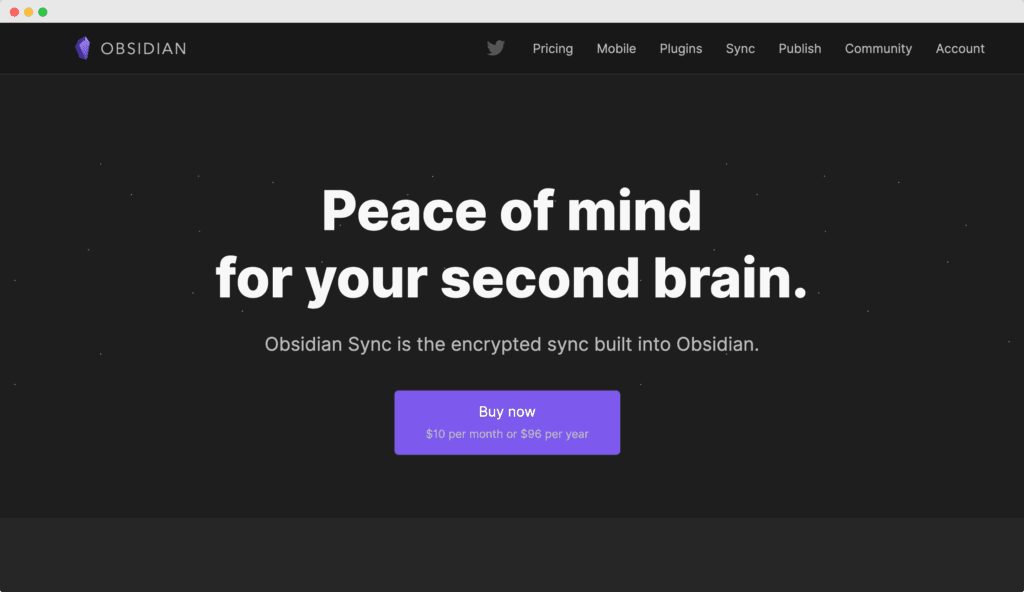
Now, subscribe to Obsidian Publish on Obsidian’s official website.
By the time of writing this article, it costs $20 per month (or $192 per year) per site:
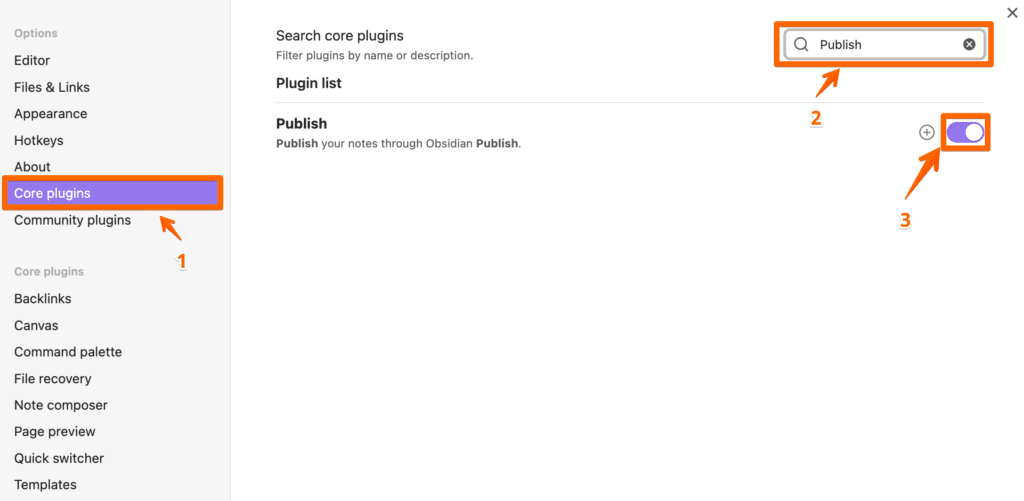
Activate the Obsidian Publish Plugin
For that, simply head over Settings > Core plugins > Publish
Once activated, you’ll notice a new icon on the left-hand sidebar that looks like this:
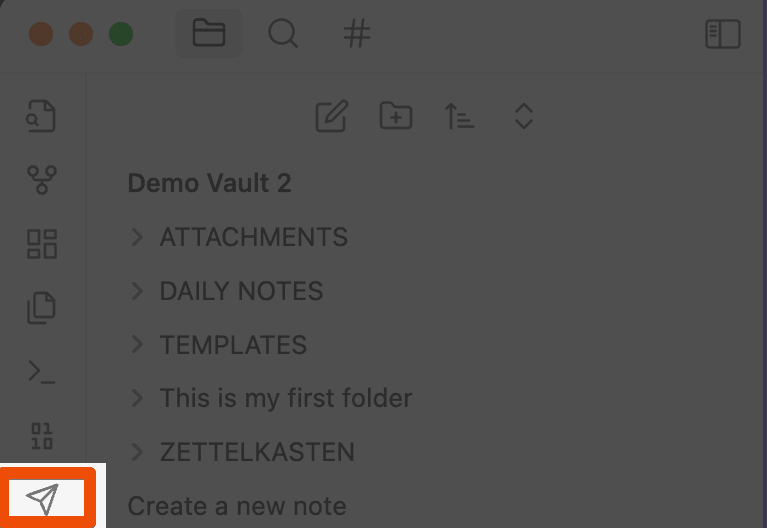
Click on it.
Now you can activate your site
Under Site ID, enter the path you want for your site. For example, my one would be: Matt Giaro publish.obsidian.md/mattgiaro
Then, click Create.
Now, you want to specify which notes should be published and which don’t.
You do so by heading over to the Publish changes dialog.
Click NEW to see all the notes you haven’t published yet.
- Select the notes you want to publish.
- Click Publish.
And voila.
There are more things to do with Obsidian publish, such as specifying your own domain name.
Issues when blogging with Obsidian Publish
Obsidian Publish is easy to set up.
But I would not recommend using it. There are multiple reasons for that.
Here are the most important ones:
Pricing
I feel that the pricing is just not worth it. You could get more bang for your buck by buying hosting and installing as many WordPress installations as you need to handle your blog.
Lack of customization
Obsidian Publish looks cool.
But you can’t really build a website that captures leads. Plus, if people are already familiar with the concept of linked notes, having a graph view on the right may make sense. It will confuse the 99% remaining once.
Obisidian Publish is not optimized for SEO
The second major flaw is that Obsidian is not optimized for SEO.
But one of the reasons you’re creating content is to get discovered online, right?
When you know that Search Traffic is one of the best free and long-lasting traffic sources out there, using Obsidian Publish to share your work is shooting yourself in the foot.
The reason is that it has a improper linking format in the sidebar, are does not allows you to customize meta data for images, or the pages themselves.
So if you want to set up your blog with Obsidian, I recommend the second option below.
obsidian to blog with the Obsidian WordPress Publish Plugin
Obsidian shines because it has a very strong and passionate community around it.
This means that you’ll find a lot of free plugins created by amazing developers to make your life in Obsidian easier.
When it comes to blogging, there’s a great plugin created by devbean.
What this plugin allows you to do is to directly publish an article from Obsidian to your WordPress blog.
Why WordPress? WordPress powers every fourth website on the internet. It’s a blogging solution that has demonstrated its robustness and versatility.
You can’t go wrong with WordPress.
Installing Obsidian WordPress Publish
First, you need to install the Obsidian plugin.
- Open your Obsidian vault
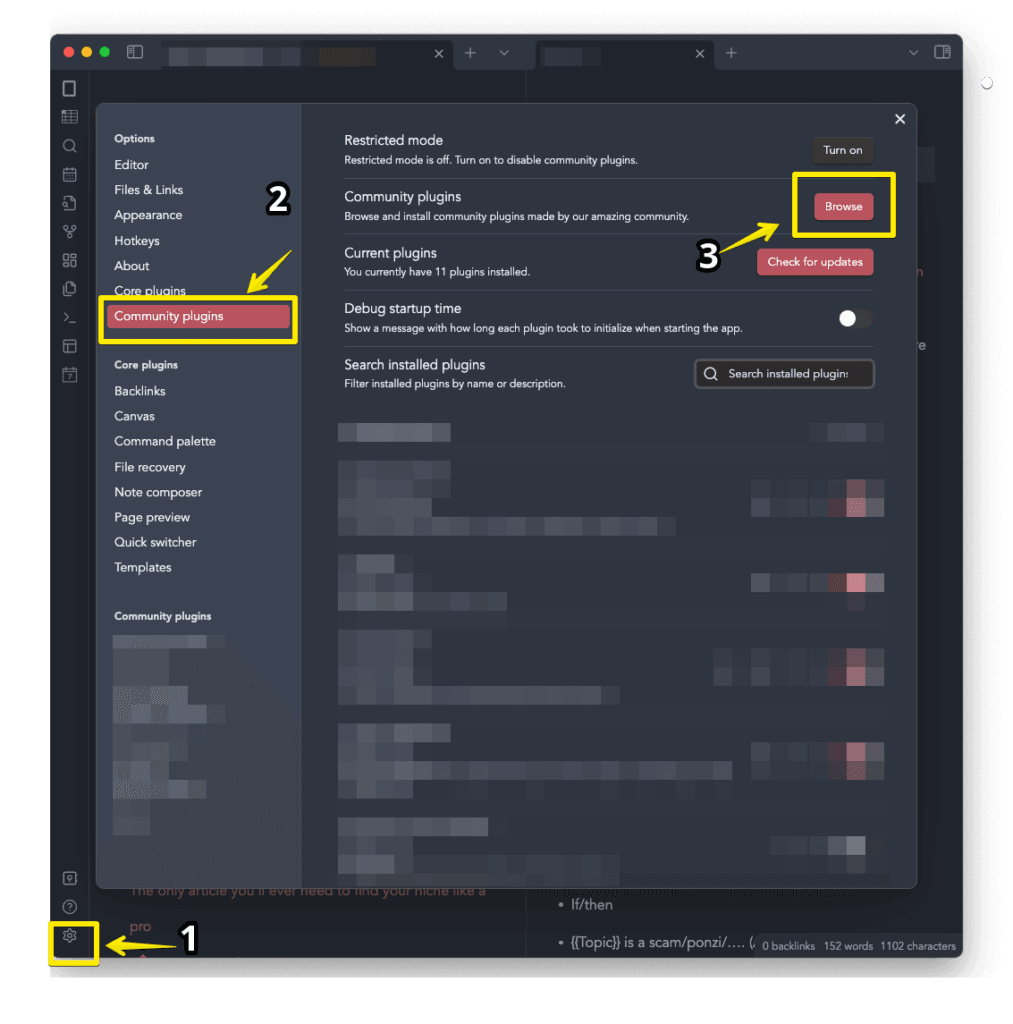
- Click on Settings (gear on the bottom left)
- Go to Community plugins (In case it’s your first community plugin, you need to deactivate the safe mode first)
- Click on Browse
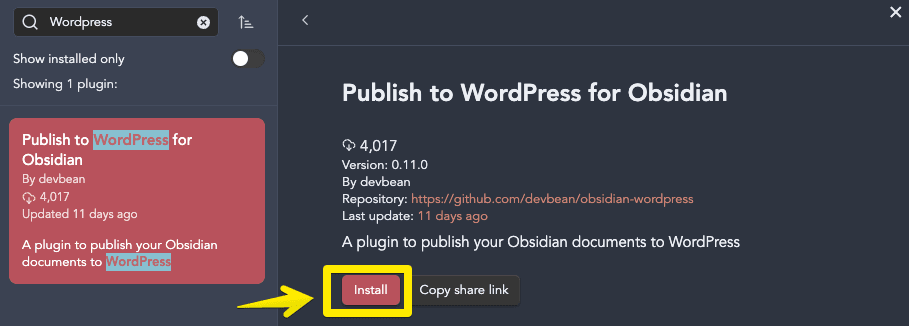
- Search for “WordPress”
- Click Install
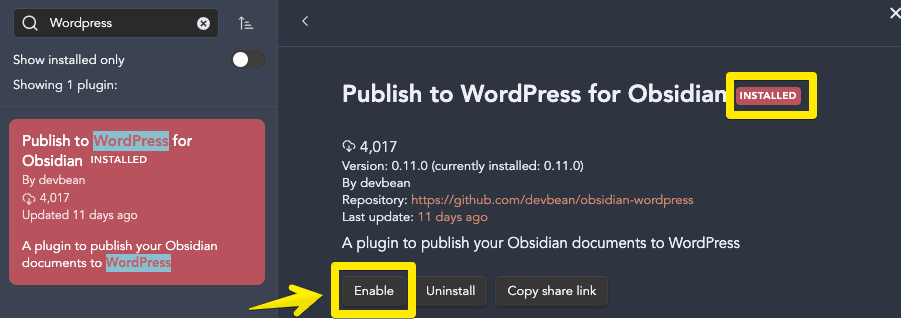
- Once installed, click on Enable
How to set up Obsidian WordPress Publish
Now, you’ll see that a new icon appears in the left menu:
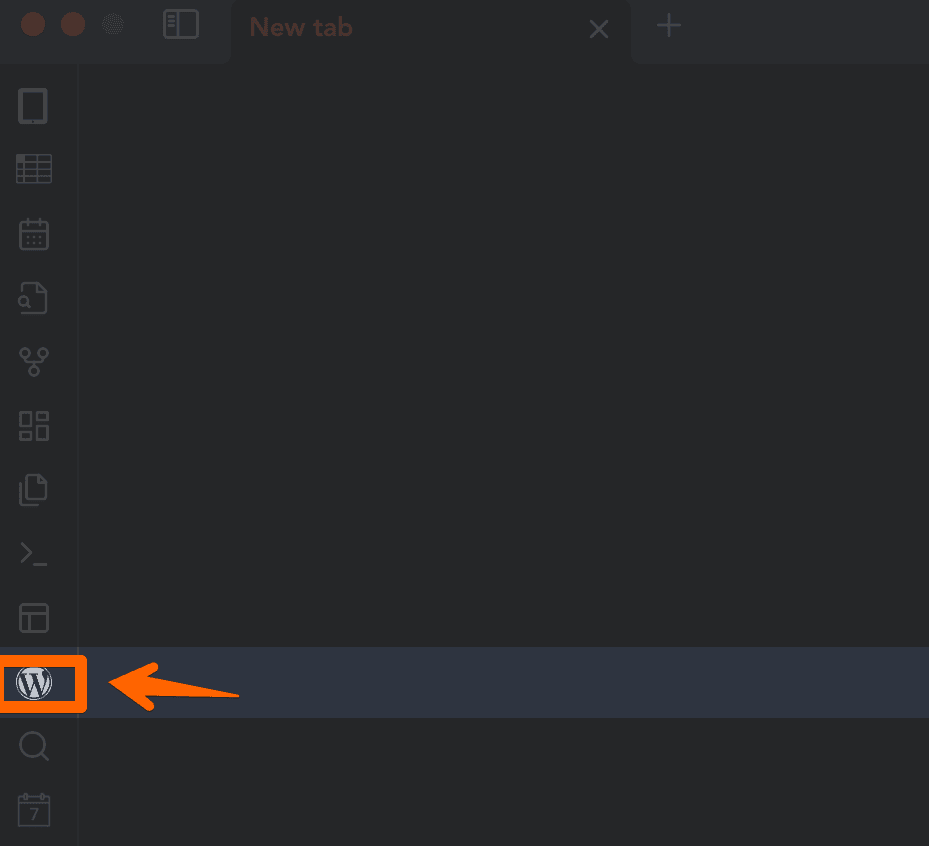
This is the icon you’ll need to click on to send your note to your WordPress blog.
So let’s create a new note.
Within the note, click the WordPress icon.
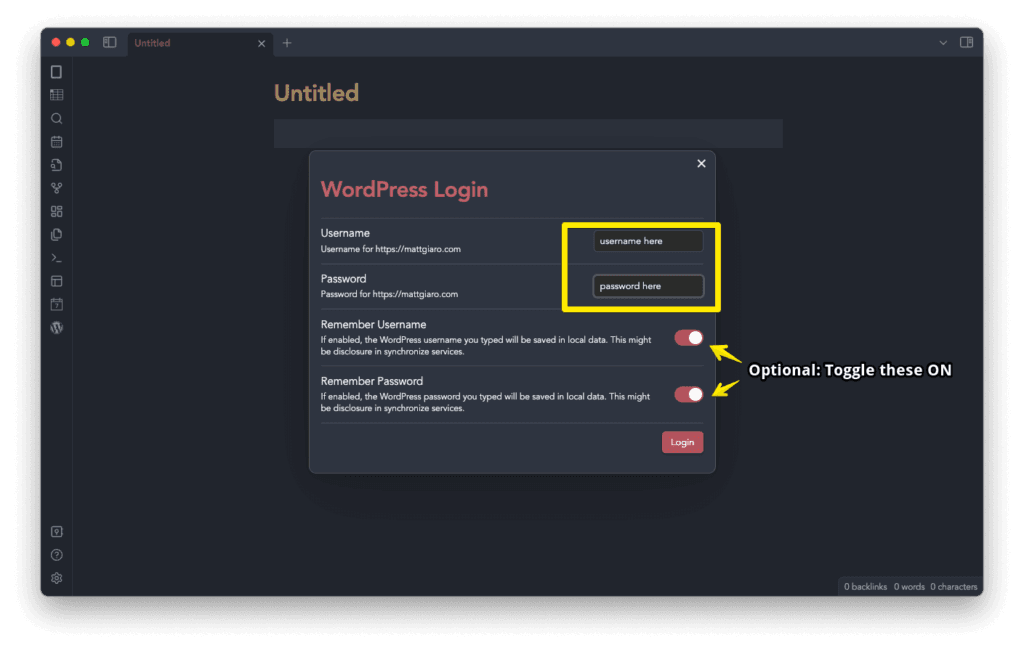
A new window will show up asking you for the credentials:
Create a WordPress application password
For this plugin to work, you need to give the plugin access to your website.
Great news: If you’re on WordPress 5.6, you don’t need to install any third-party plugin.
- Simply head over to your admin panel at: https://yoursite.com/admin
- Log in.
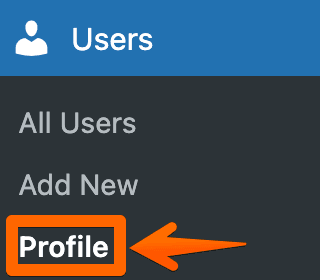
- And then click on Users > Profile
- Now, generate a username and password for the Obsidian Blogging Plugin like so:
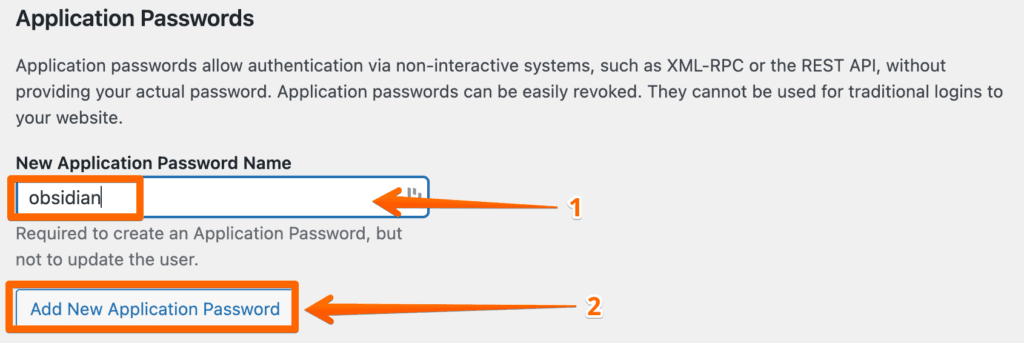
- Copy the password

- Go back to Obsidian and key in the details like so:
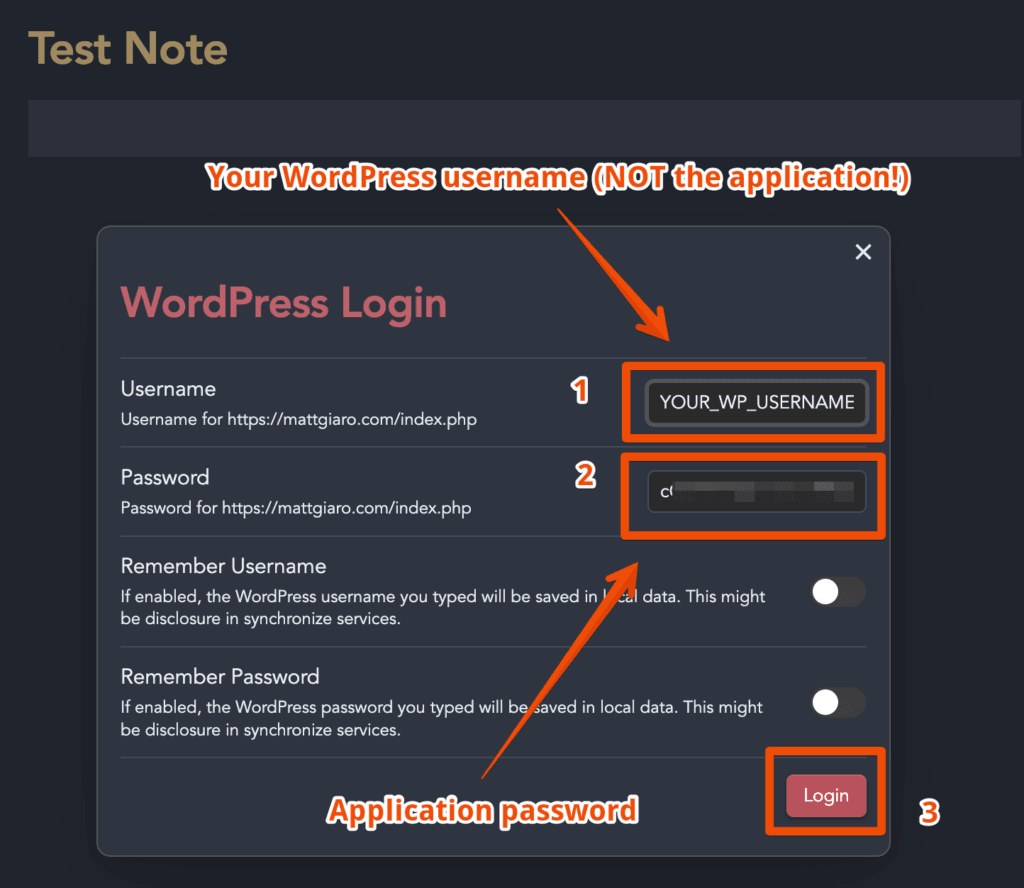
And if you want Obsidian to remember the credentials, toggle on the “Remember Username” and “Remember Password” options.
- A new window will appear asking you for 3 things:
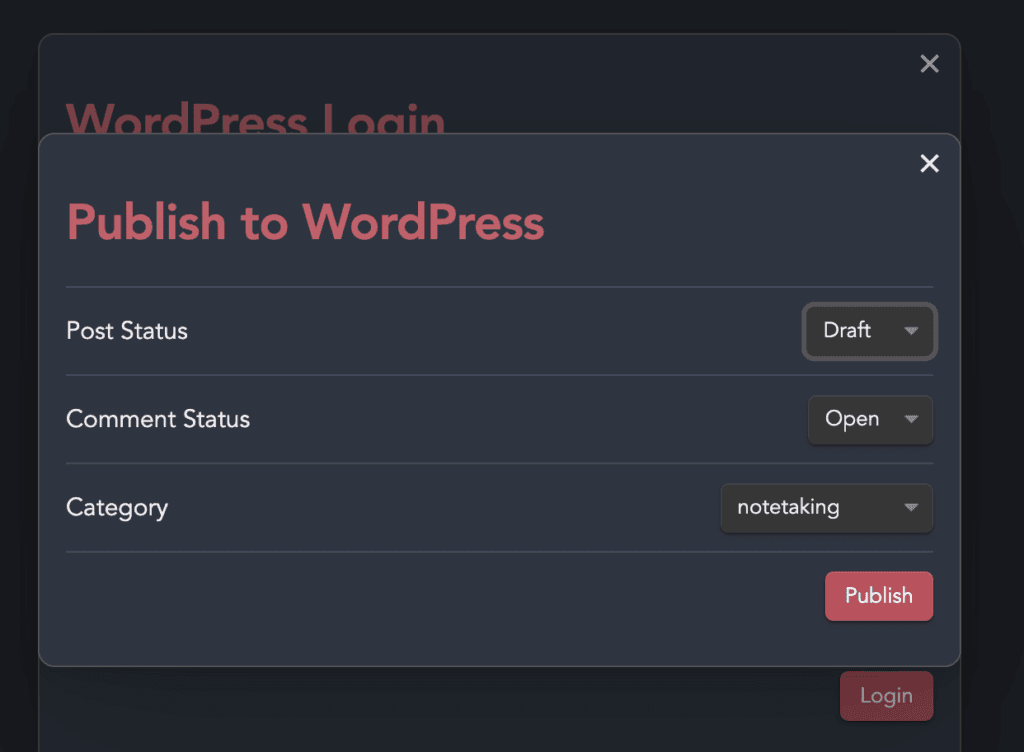
- First, the status: Would like your post to go live or keep it as a draft?
- Second, the comments: Do you want comments turned on or off?
- Third, the post category.
Select the options that suit you and hit enter.
🥳 And voila, congrats!
The blog entry you wrote in Obsidian has just been sent to your WordPress blog.
Blogging With Obsidian: Conclusion
If you want to blog with Obsidian you have two choices.
While both Obsidian Publish and the Obsidian WordPress plugin are pretty easy to set up, I’d recommend the latter.
The reason is that WordPress is still one of the best platforms to start your blog. It allows you to rank on Google (SEO optimized), and you can also use it to create your sales pages, add capture forms, etc.
More important than how to set up your blog with Obsidian is to have a rock-solid workflow to turn your notes into online content.
This is exactly what my FREE Course below will show you how to do it:
